How to Create Your First Resume Online: A Step-by-Step Guide for Beginners
Writing a resume from a blank page can feel overwhelming. Which sections do you need? How should it look? What if the formatting falls apart the moment you add one more line?
OnlineResumeAI takes care of the layout, so you can focus on what matters: your experience. You pick a professionally designed template, type your details, and watch your resume take shape in a live preview as you go.
In this guide, we'll build a complete resume from scratch, step by step.
Before you start
- No account is needed to begin. You can build and preview your whole resume as a guest.
- Have your key details handy: your job history (titles, companies and dates), your education, and a few skills.
- Set aside about 15–20 minutes for a first full draft.
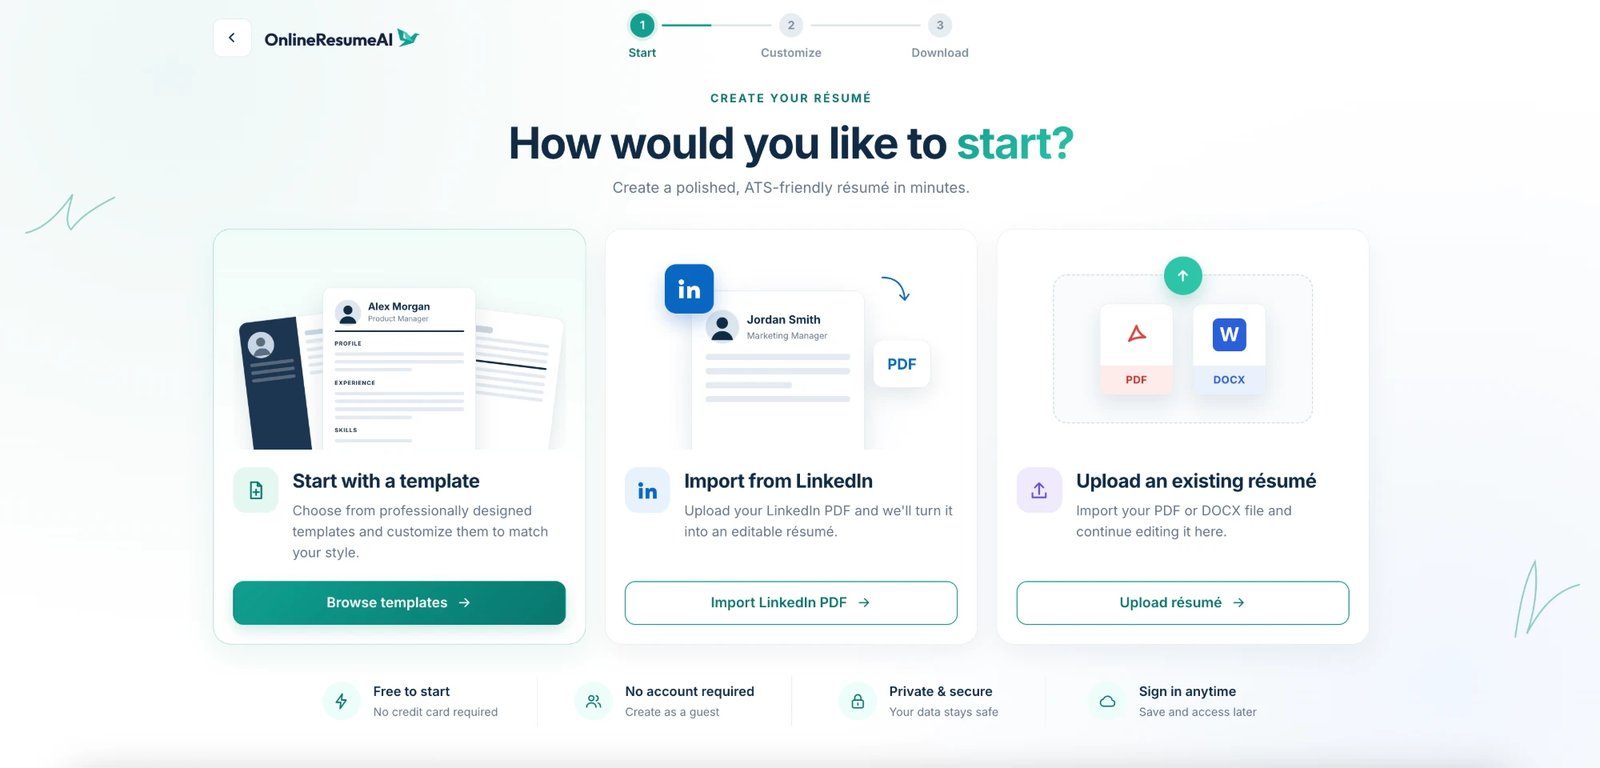
Step 1: Choose "Start with a template"
Go to Create resume. You'll be asked "How would you like to start?" Click Browse templates on the Start with a template card.
Step 2: Pick a template
You'll land in the template gallery. Browse by category (Professional, Modern, ATS-Friendly, Executive, Minimal, Compact, Simple), filter by Photo templates, or use the search box.
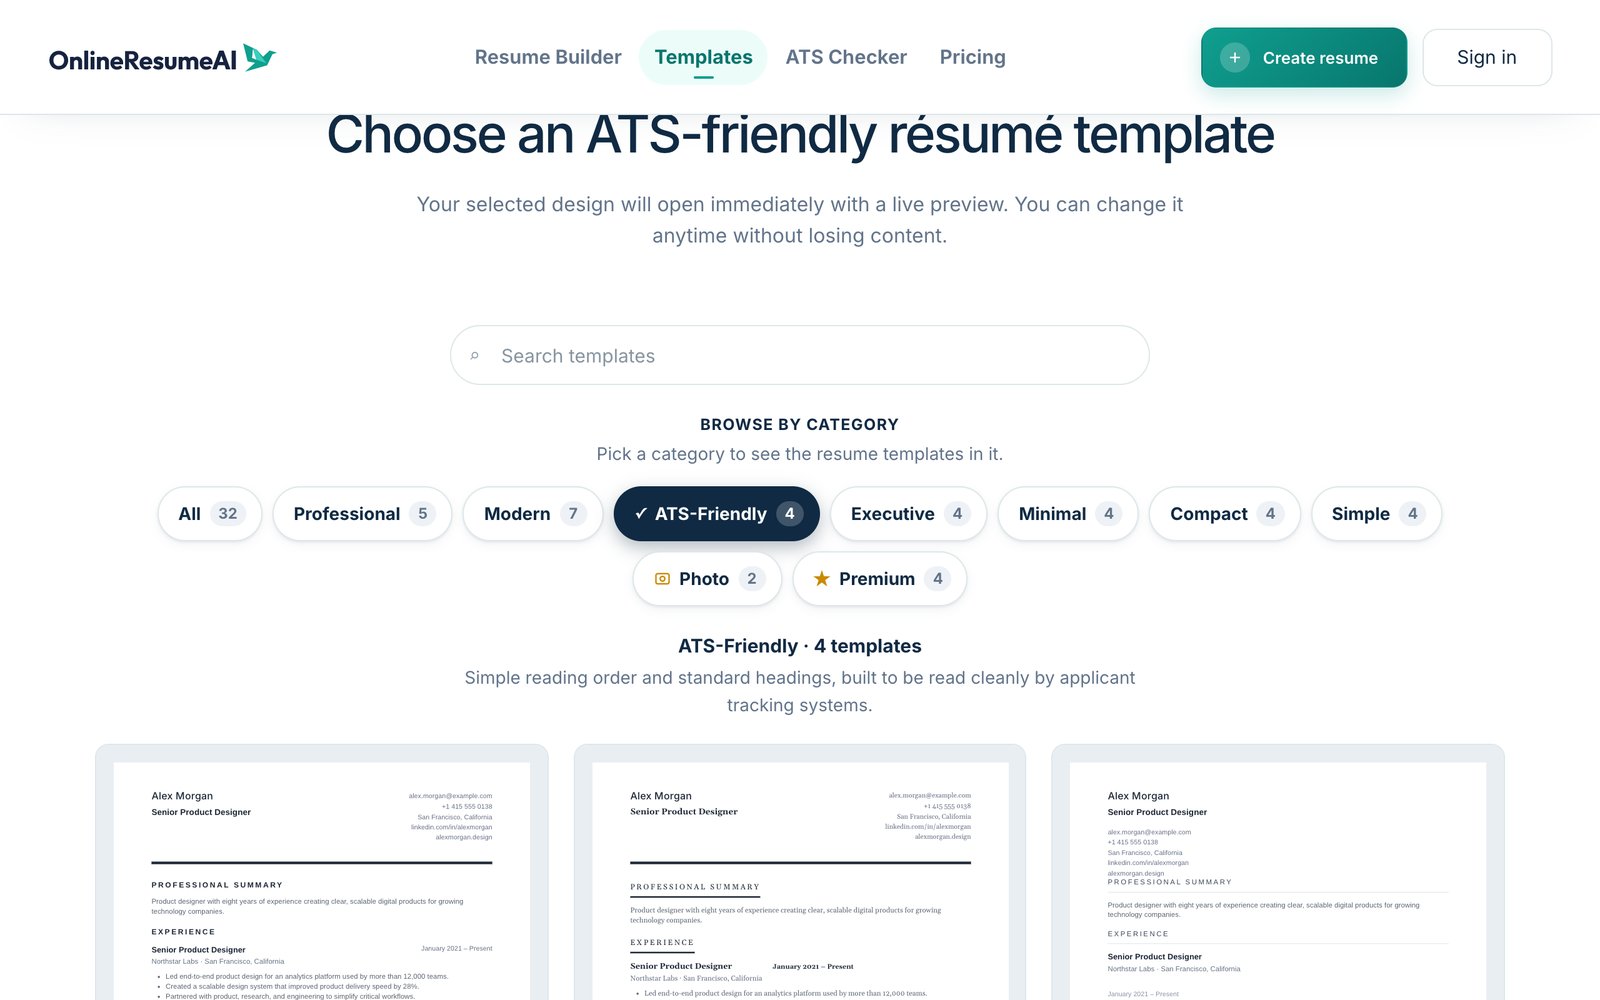
Click Preview to see a template up close, then Use template to open it.
Step 3: Get to know the editor
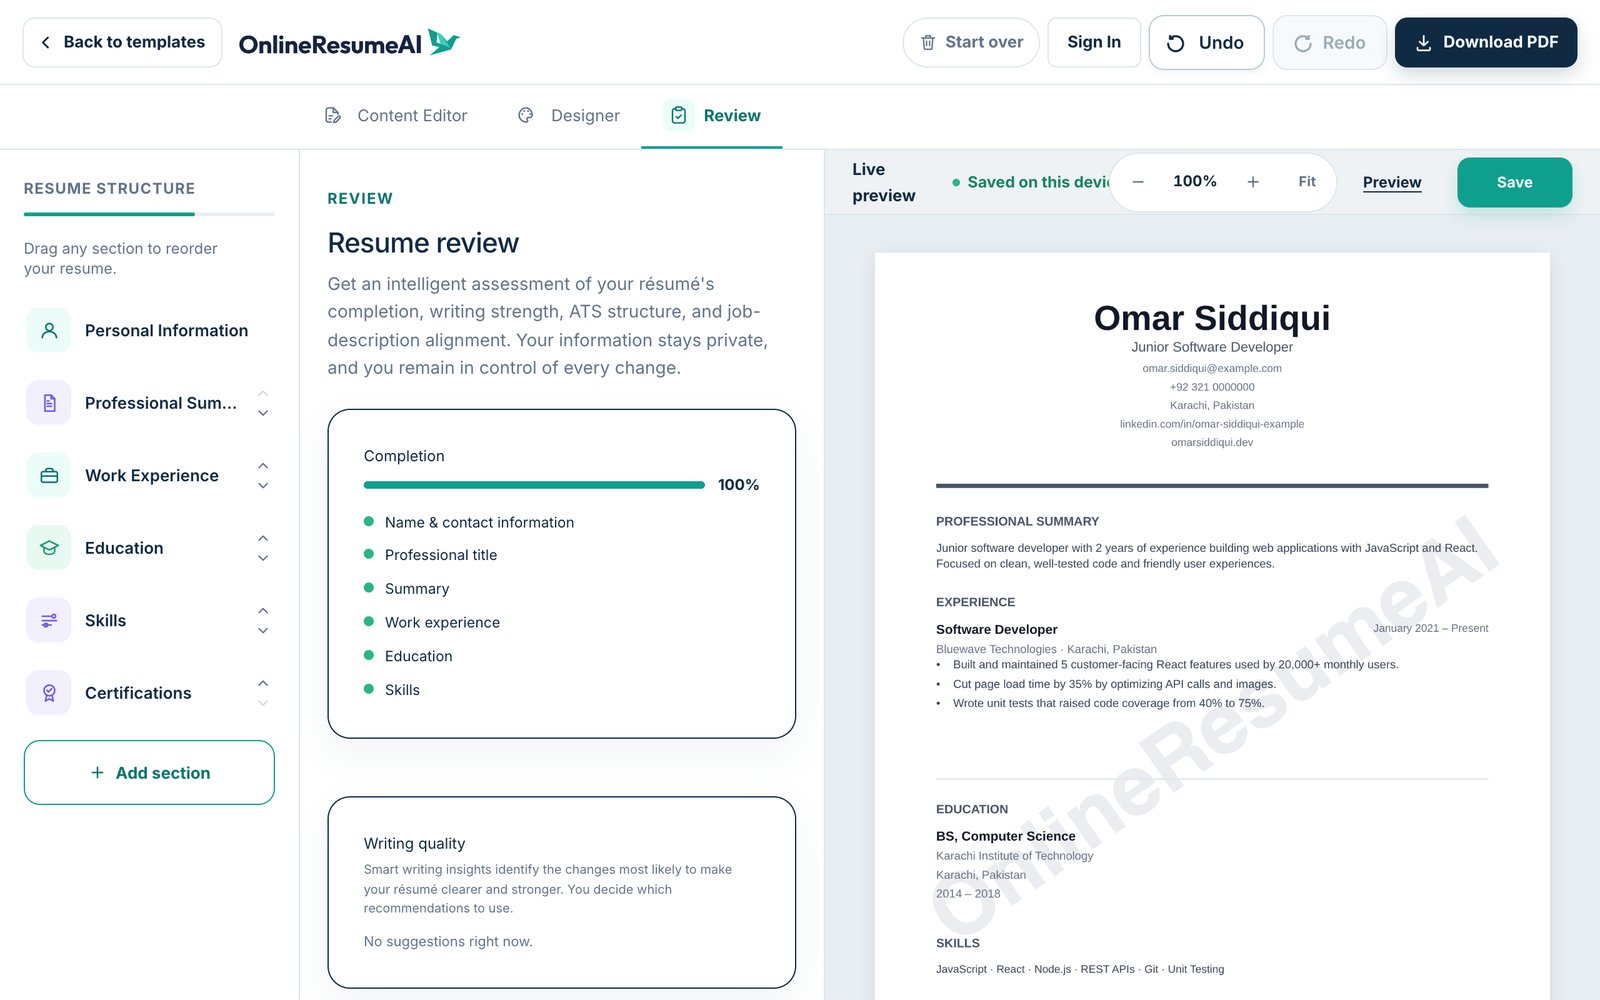
Your template opens in the resume editor. It has three simple areas:
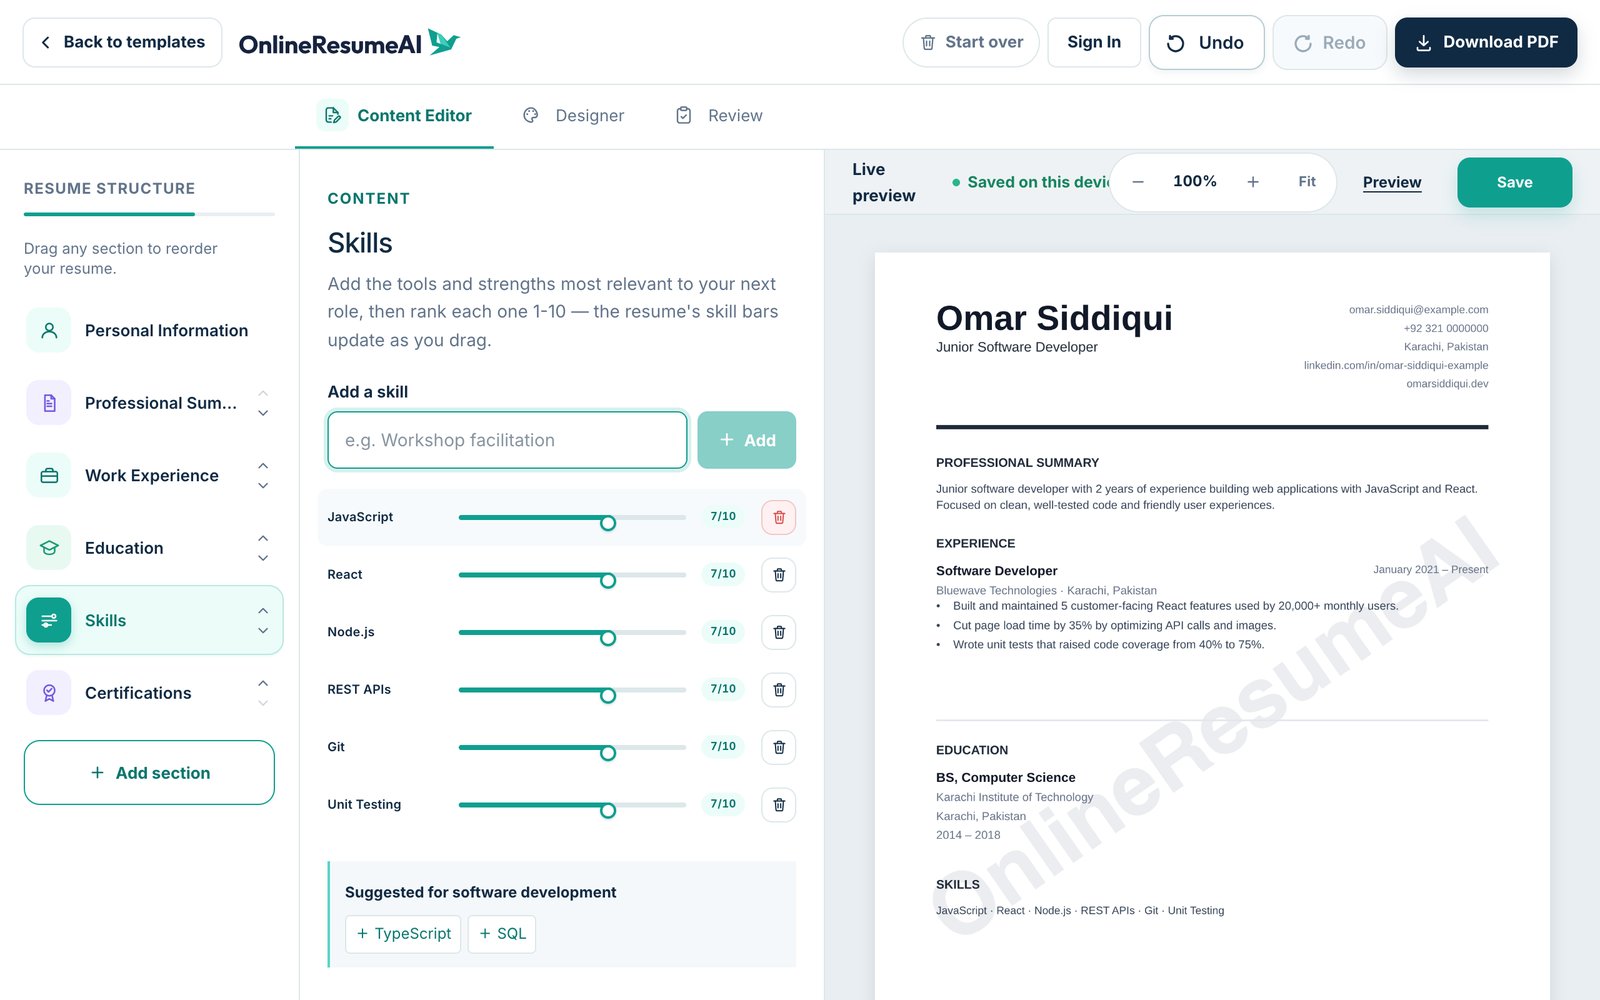
- Resume structure (left): the sections of your resume. Click one to edit it, or drag it to change the order.
- The editing panel (middle): where you type. Use the tabs at the top to switch between Content Editor, Designer and Review.
- Live preview (right): your finished resume, updating as you type.
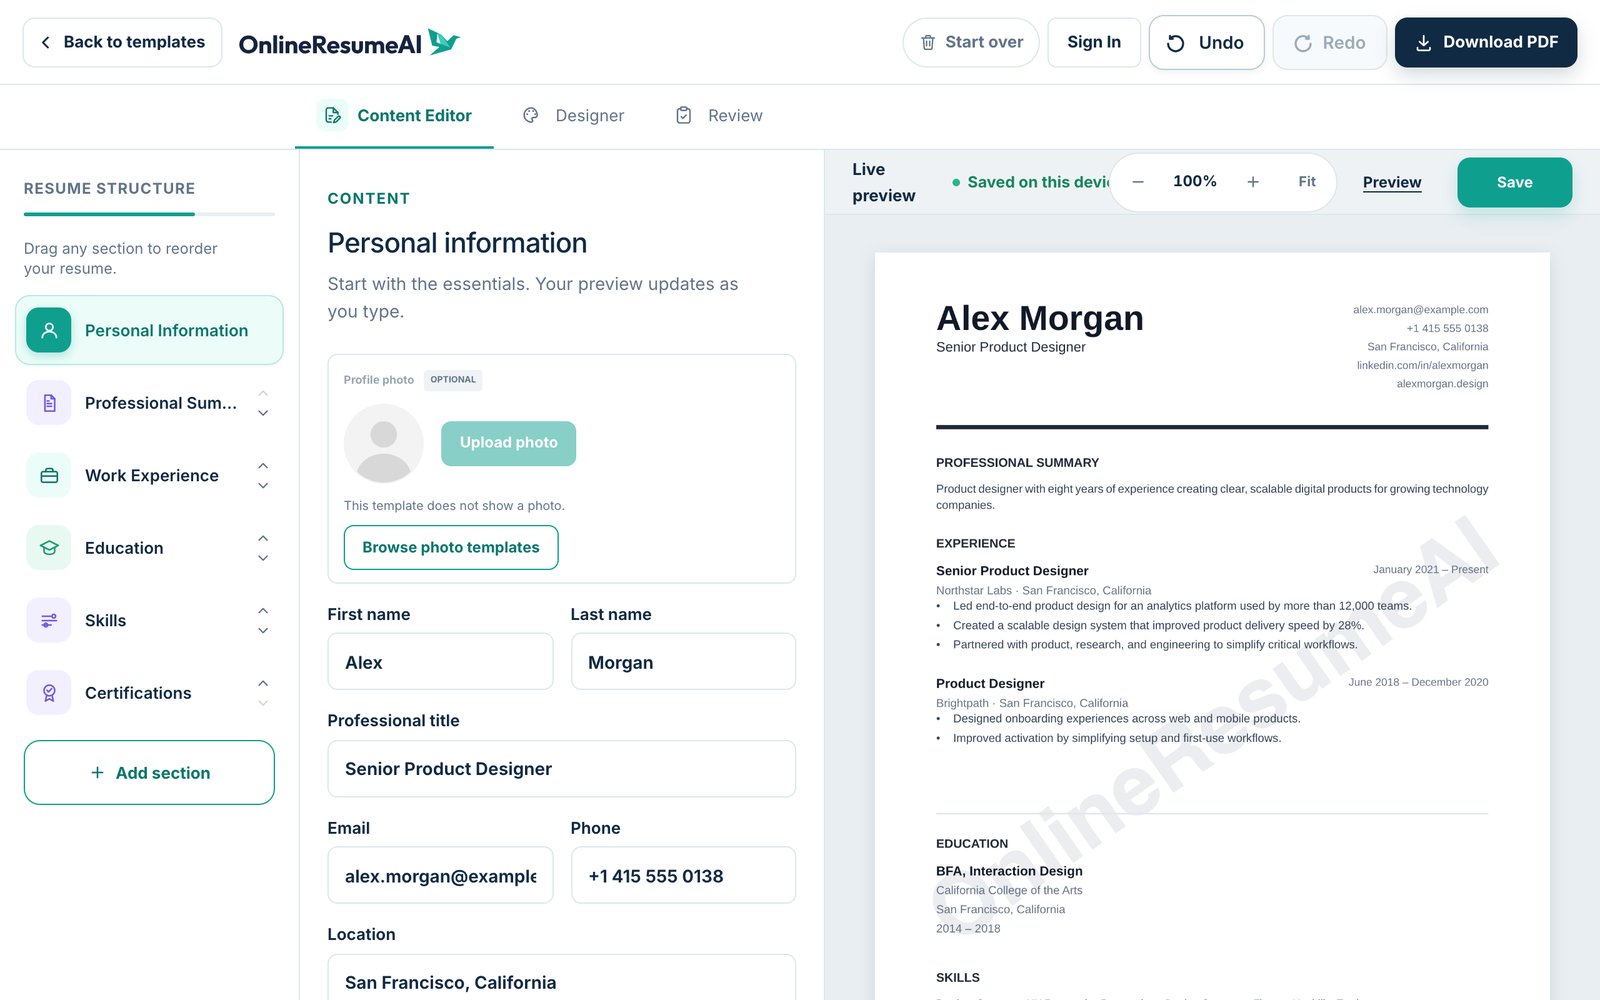
You'll notice the resume is already filled with example content. It's there to show you what a strong resume looks like. Replace it section by section with your own details.
Step 4: Add your personal information
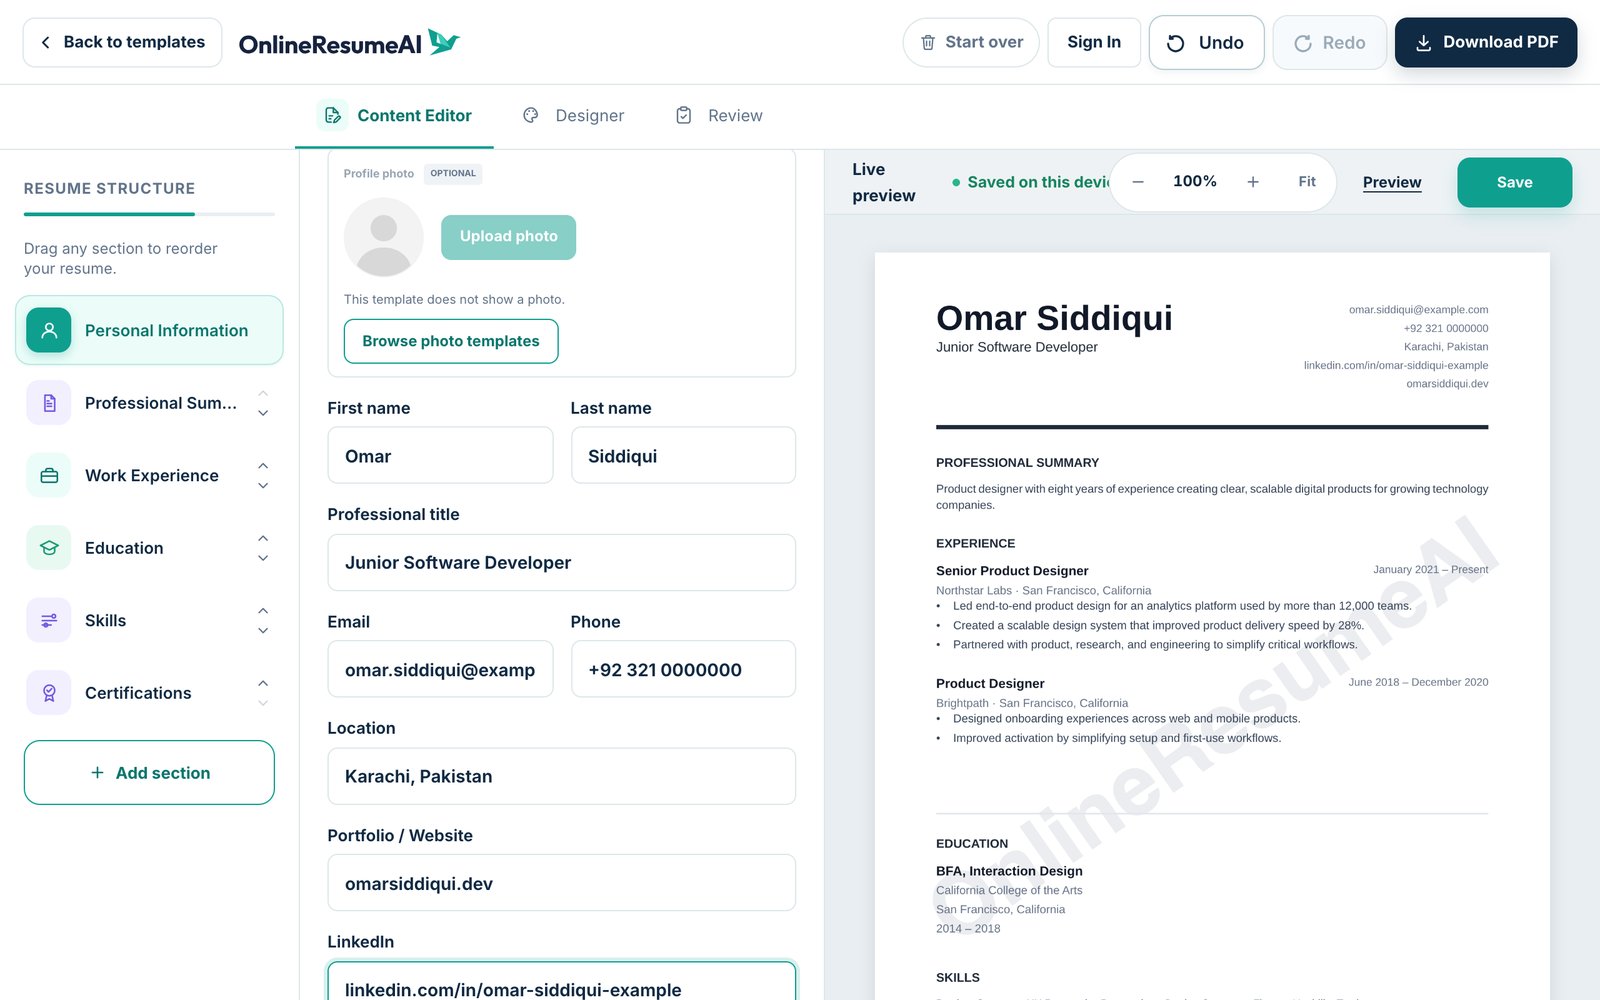
Start with Personal Information: your first and last name, professional title, email, phone, location, and optionally your website and LinkedIn.
Step 5: Write a short professional summary
Click Professional Summary. In a few sentences, introduce who you are, what you're good at and what you're looking for.
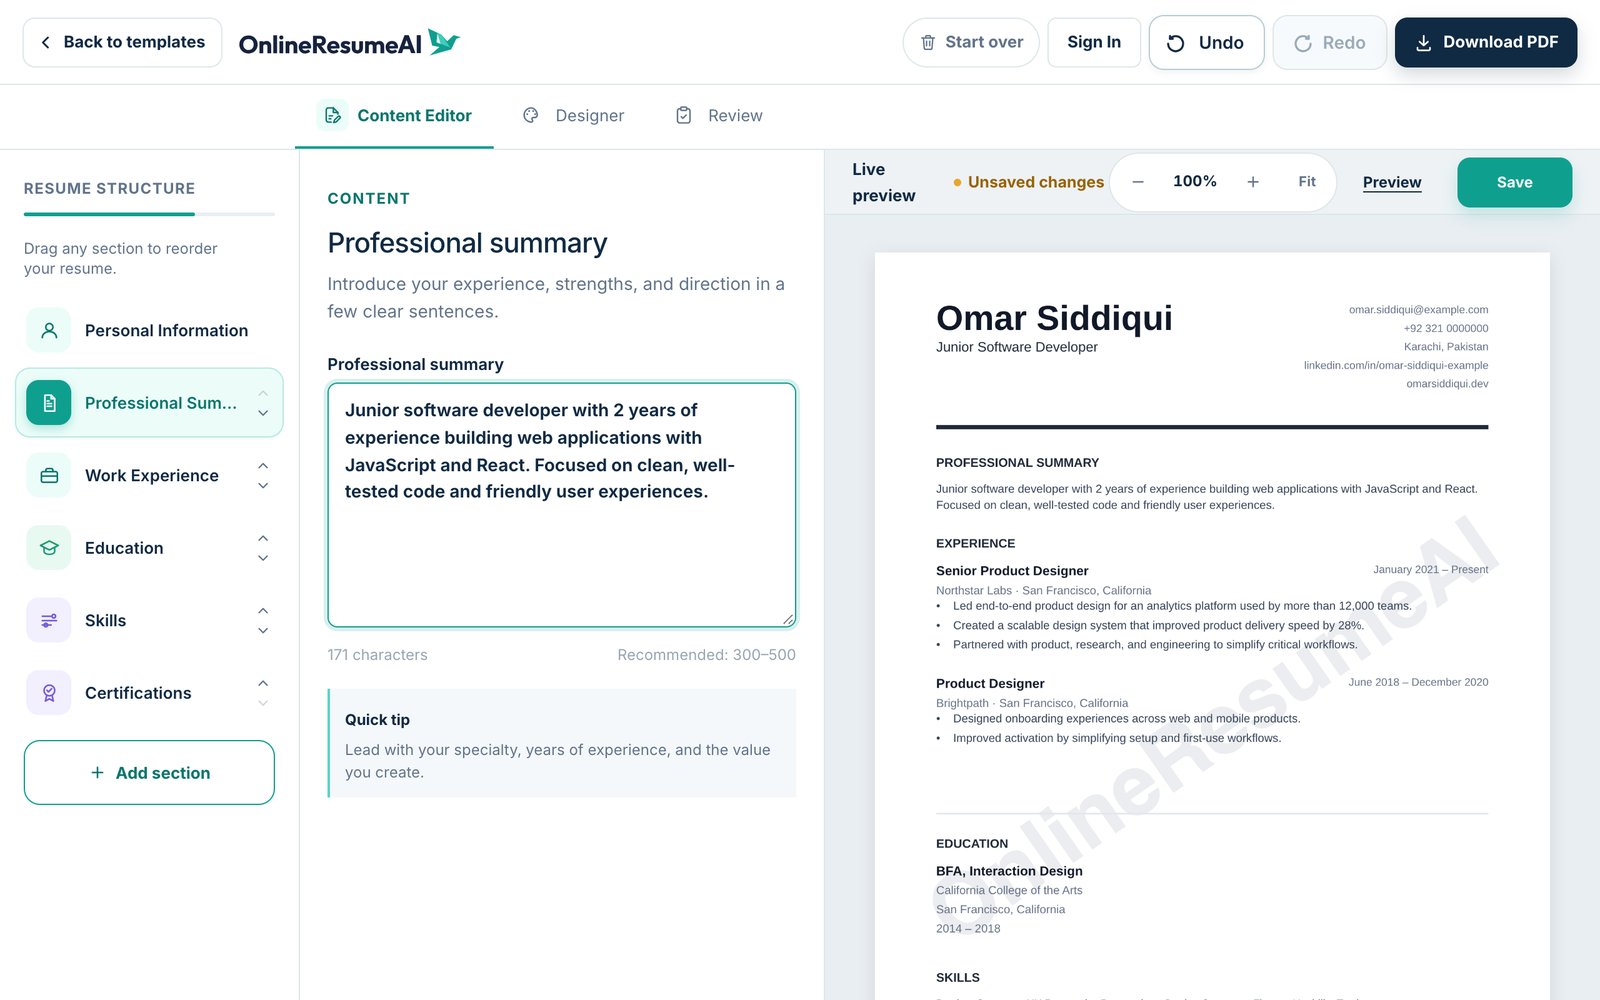
The editor helps you get the length right with a character counter (it recommends 300–500 characters) and a quick tip: lead with your specialty, years of experience, and the value you create.
Step 6: Add your work experience
Click Work Experience. For each job, fill in:
- Job title and company
- Location
- Dates: pick a start month and year, and either an end date or Currently working here
- Key achievements: your main responsibilities and results
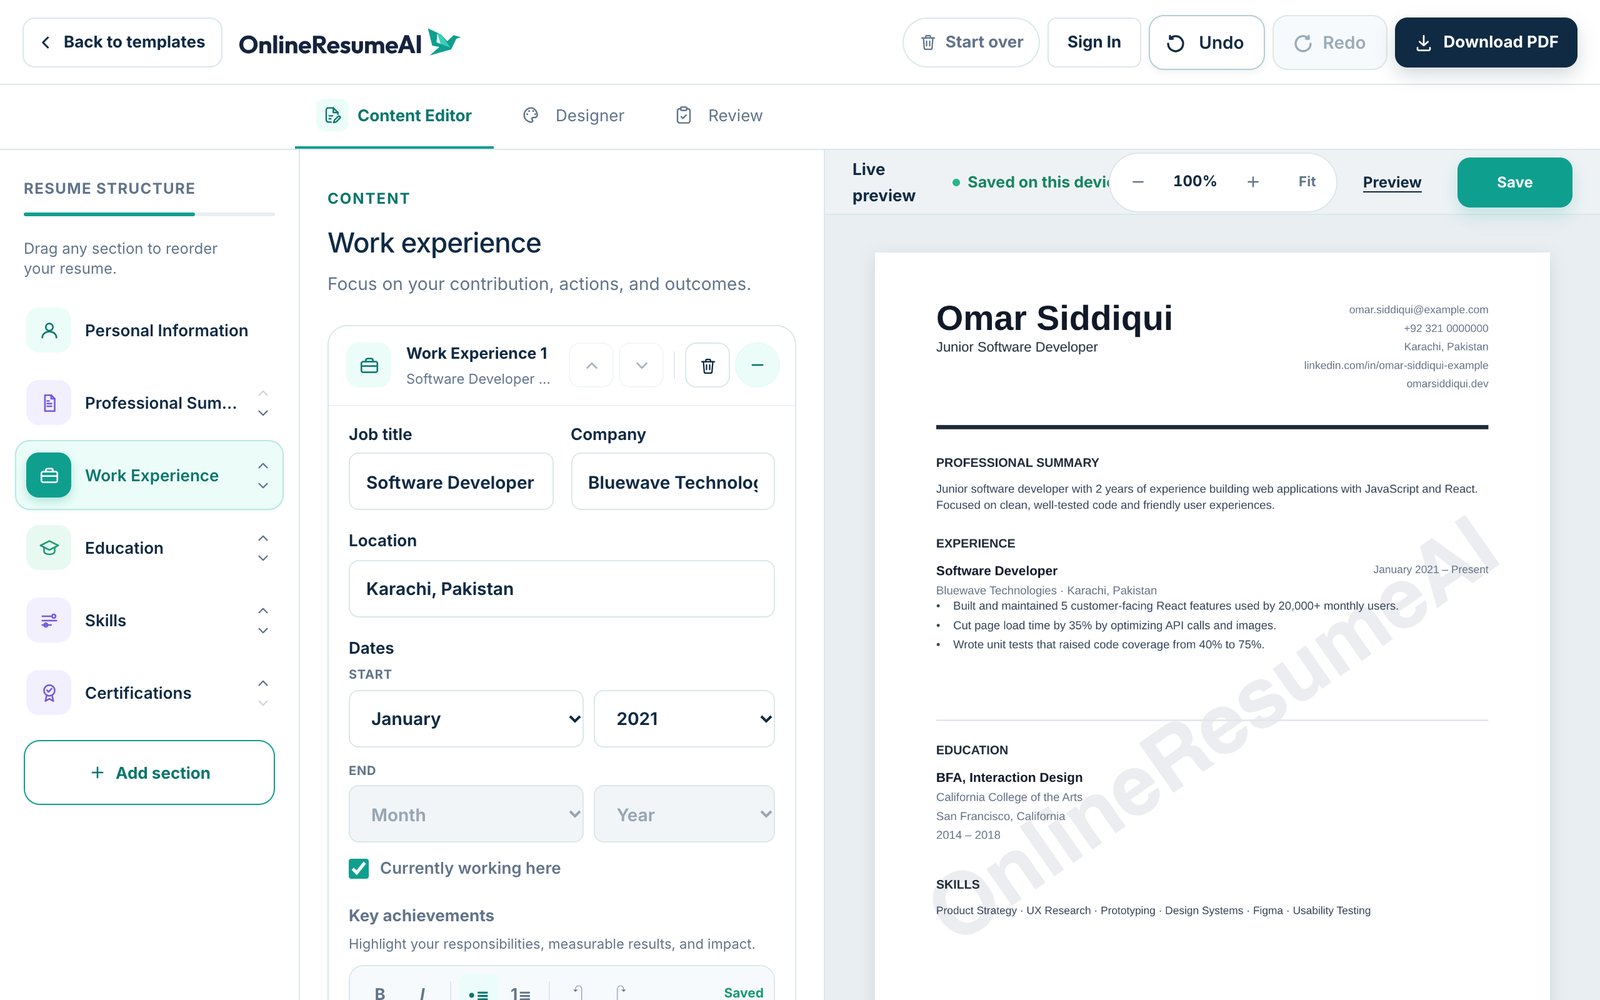
The Key achievements box works like a mini word processor. You can use bold, italic, bullet points and numbered lists, and press Enter to start a new bullet.
To manage your jobs:
- + Add experience adds another job
- The ↑ ↓ arrows reorder jobs
- The trash icon removes one (you'll be asked to confirm first)
Step 7: Add education and skills
Education works the same way as experience: add your degree, institution, location and dates. There's also a Currently studying here option if you're still a student.
In Skills, type a skill and click Add. Each skill has a 1–10 slider so you can show your strongest areas. In templates with skill bars, the bars update as you drag.
Step 8: Add extra sections (optional)
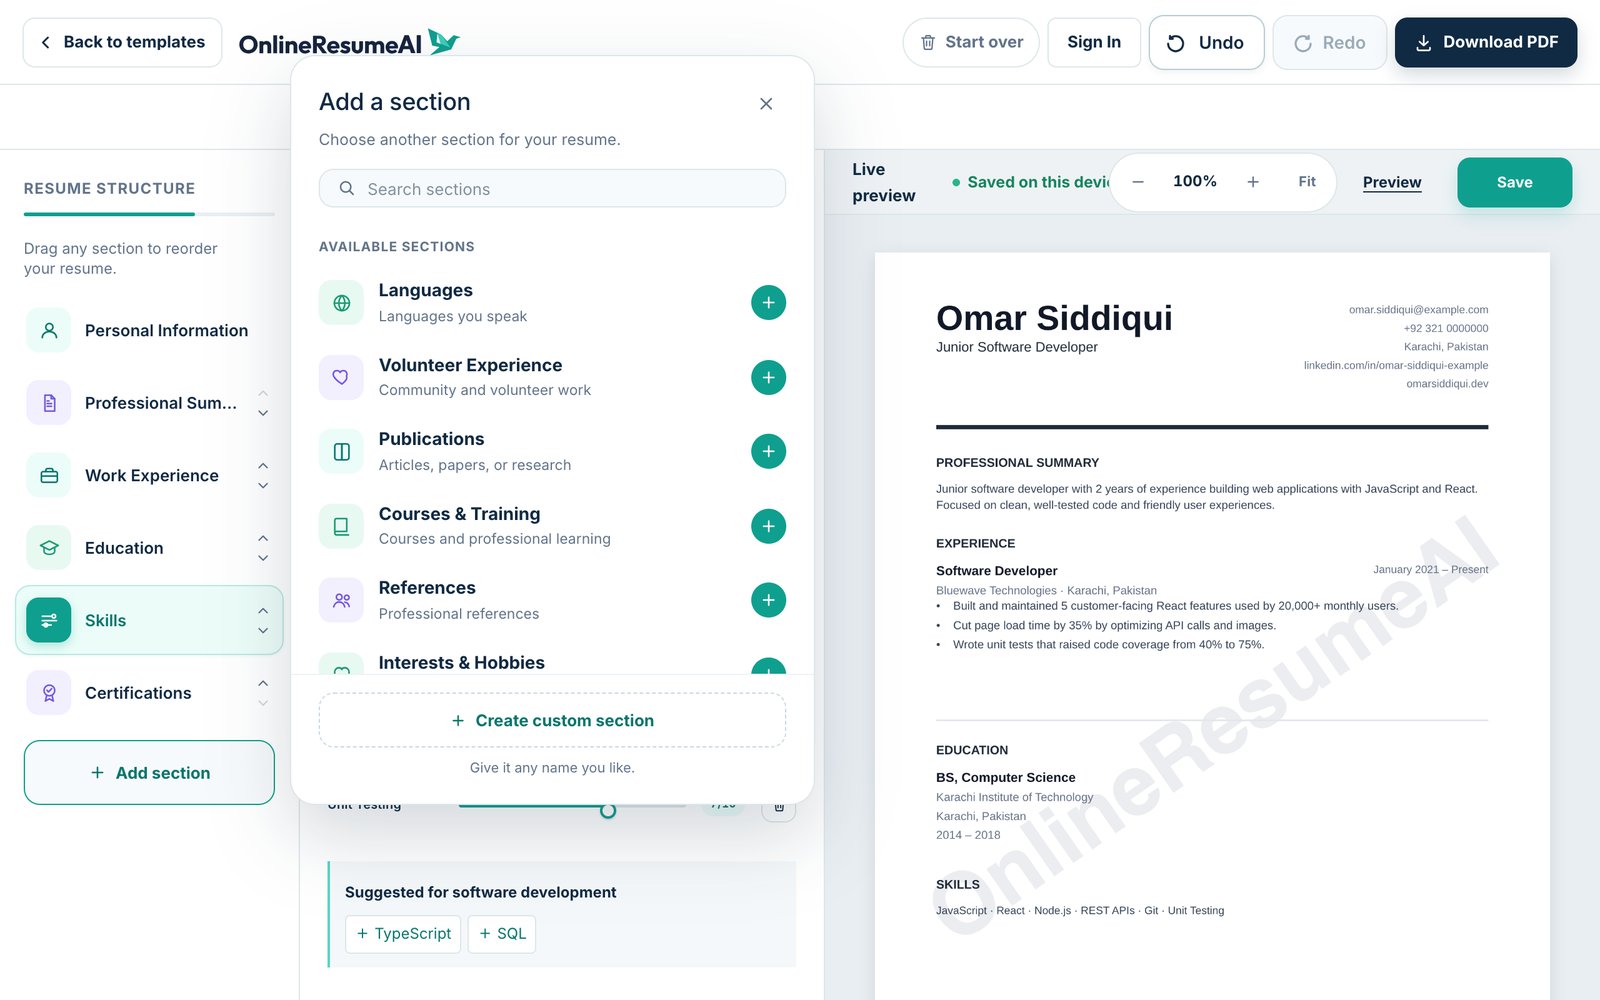
Want to show more? Click + Add section at the bottom of the resume structure. You can add:
Languages · Volunteer Experience · Publications · Courses & Training · References · Interests & Hobbies · Awards & Honors · Projects
You can also create a custom section and give it any name you like.
Step 9: Make it yours in the Designer
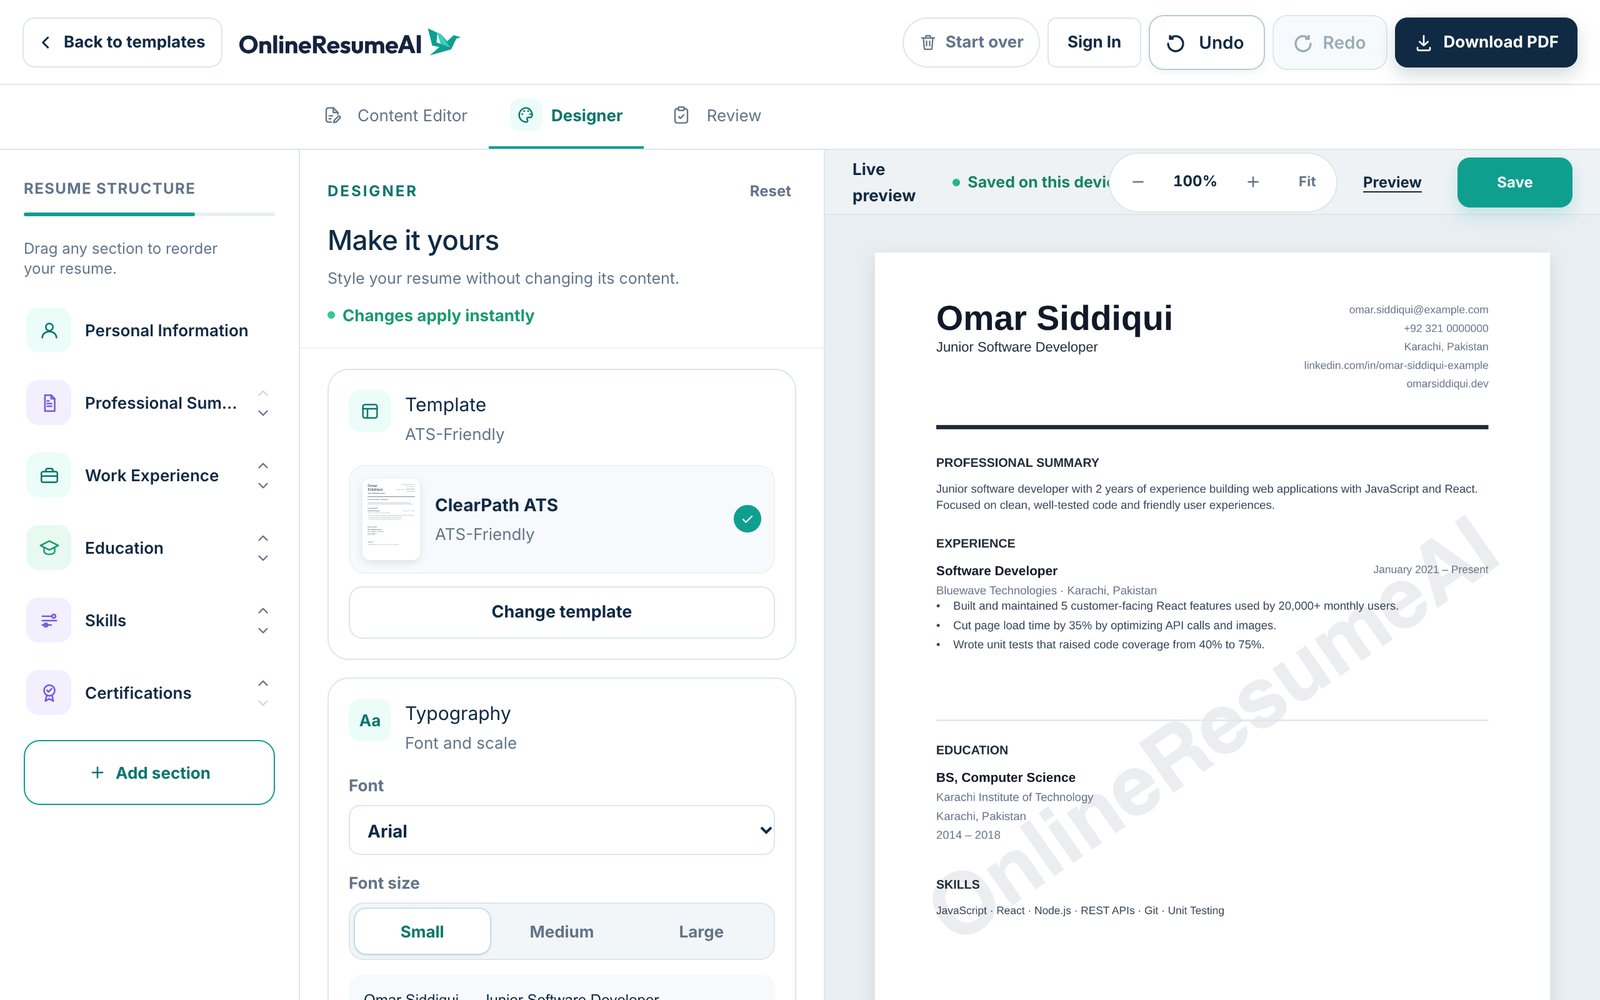
Switch to the Designer tab to style your resume without touching its content. Changes apply instantly.
Here you can:
- Change template. Try a different layout while keeping all your content.
- Typography. Choose a font and a font size (Small, Medium or Large).
- Accent color. Pick a color for headings and details, or choose your own.
- Layout & spacing. Set the header alignment (Left, Centered or Split) and section spacing (Compact, Normal or Spacious).
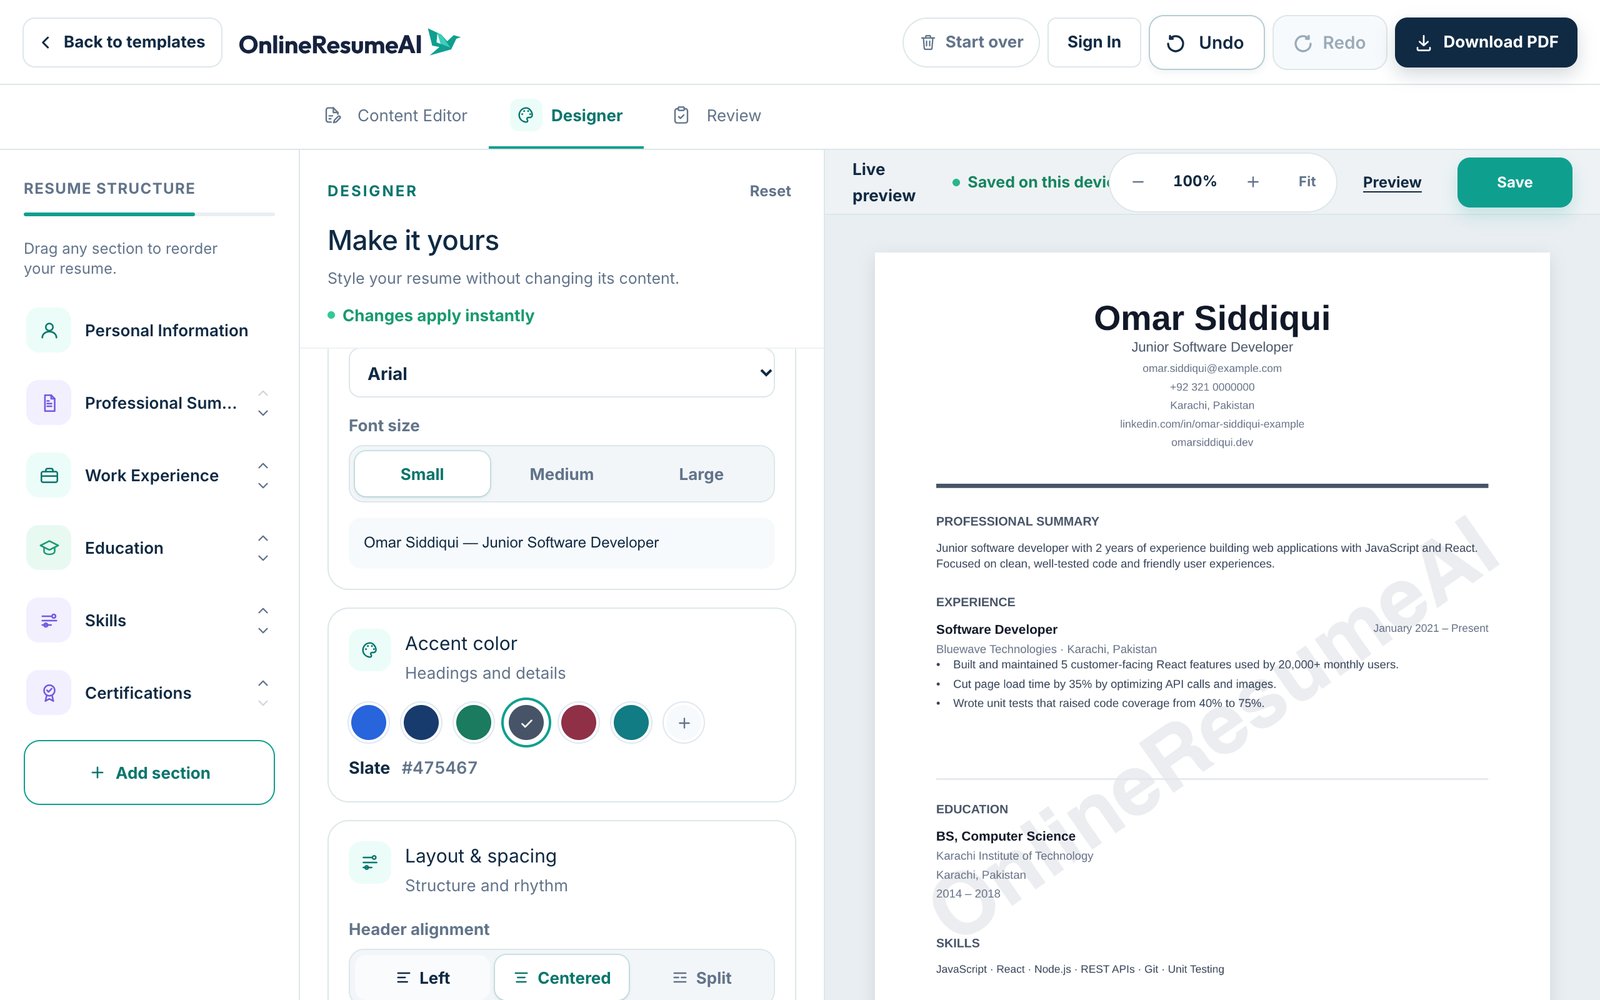
Not happy with your changes? Click Reset to go back to the template's original style.
Step 10: Check your resume with Review
Open the Review tab for an intelligent assessment of your resume before you send it:
- Completion. A checklist showing which key sections are done.
- Writing quality. Smart writing insights point out statements that could be clearer or stronger. You decide which suggestions to use.
- ATS readiness. Checks for things applicant tracking systems look for, like standard section headings, contact details and consistent dates.
- Job description match (optional). Paste a job ad to see how many of its keywords already appear in your resume.
Step 11: Preview and download your PDF
Click Preview (above the live preview) to see your resume full size.
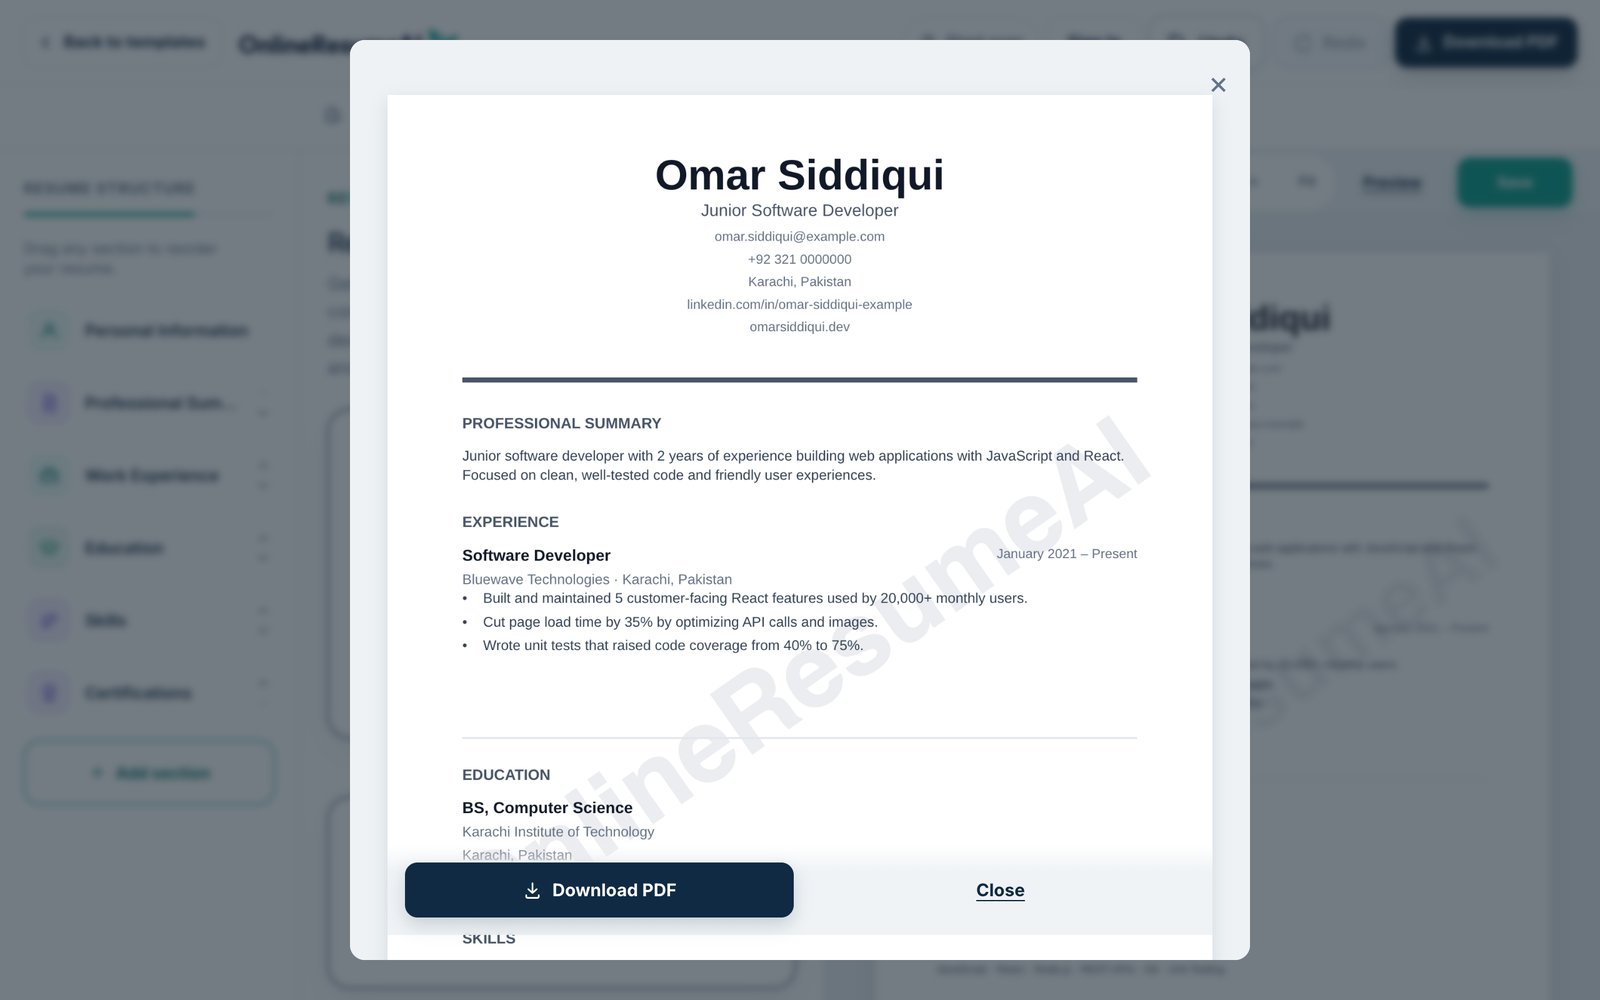
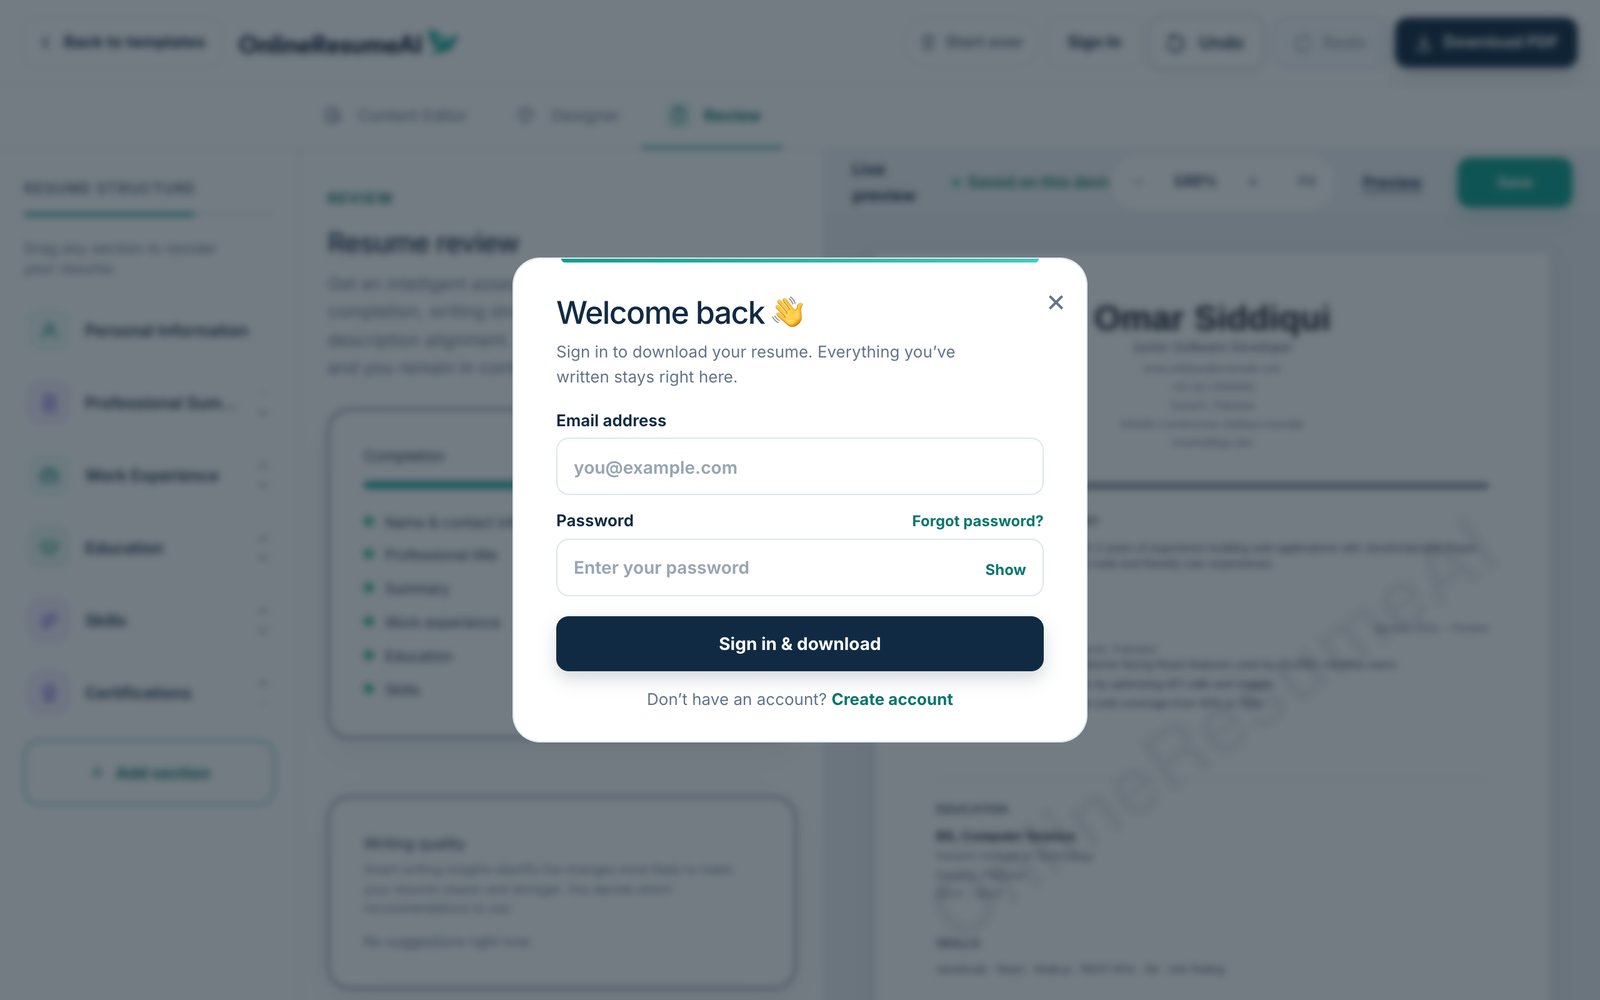
When you're ready, click Download PDF. If you're working as a guest, you'll be asked to sign in or create a free account first. Your resume downloads right after, with no print dialog to deal with.
Quick checklist before you apply
- ✅ Replace all of the example content with your own details
- ✅ Use a professional email address
- ✅ Start experience bullets with action verbs, and add numbers where you can
- ✅ Keep your skills relevant to the job
- ✅ Run the Review tab, and paste the job description to check keywords
- ✅ Preview the full page before downloading
Wrapping up
Creating a resume doesn't have to mean fighting with formatting. With OnlineResumeAI you:
- Pick a professionally designed template
- Fill in your details with a live preview
- Style it in the Designer
- Check it with the smart Review
- Download a polished PDF
You can start right now, with no sign-up needed.